GitHub Client for the Windows Store - Authenticating against GitHub
- Part 1 - GitHub Client for the Windows Store - Getting Started
- Part 2 - GitHub Client for the Windows Store - Authenticating against GitHub
This is the second part in a series of posts that will show how to create a Windows Store app that connects to GitHub.
In this second part we will implement the login functionality, that will take the user details entered by the user and call the GitHub API to authenticate the user and create a authorization token that can be used to authenticate the user in subsequent calls to the GitHub API.
Let’s get to it!
Getting started with Octokit
A GitHub API client library for .NET
To install the octokit.net NuGet package, run the following command from the NuGet Package Manager Console PM> Install-Package octokit, or from the Manage NuGet Packages dialog under Tools->NuGet Package Manager
Creating a GitHub Application
The first thing we need to do before implementing anything, is to register an applicatinon GitHub. So login to your GitHub account, go to Account Settings->Applications, click the Register New Application button.

Fill in the details of your new application
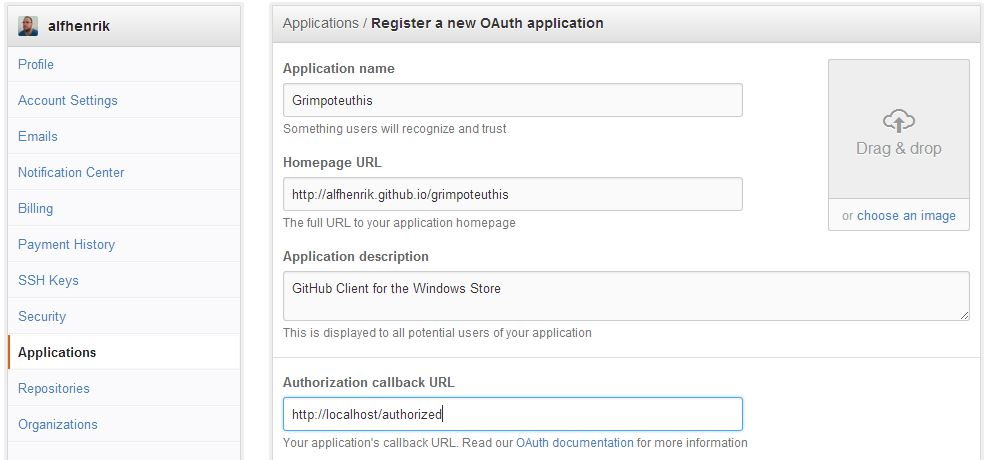
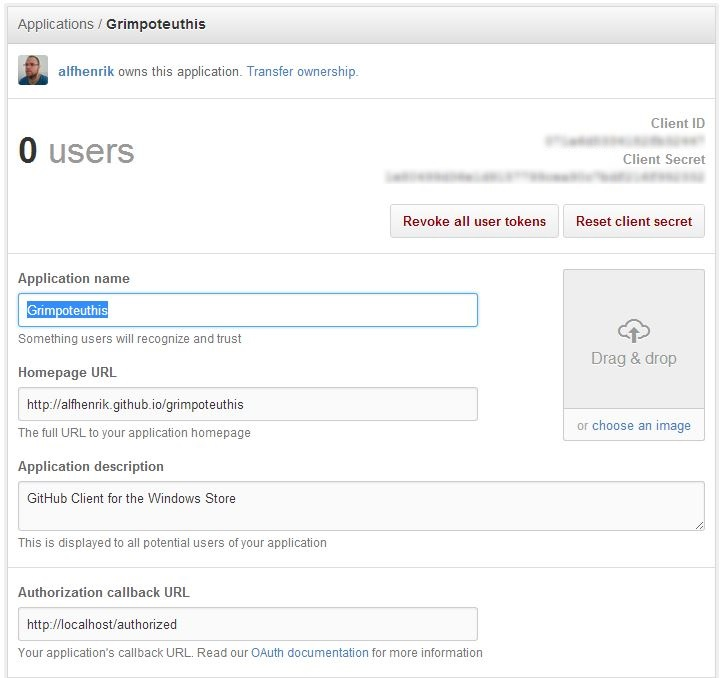
Click the Register Application button and your application will be created.
Once your application has been created, you will see the application details page.
Now that we have registered our application, we can start adding functionality to our application to allow us to login using our GitHub credentials.
Implementing Application Authentication
First we add the GitHub client object to the LoginViewModel.
1
2
3
4
5
6
7
8
using octokit;

public class LoginViewModel : ReactiveObject, IRoutableViewModel
{
    IGitHubClient _Client = new GitHubClient(new ProductHeaderValue("Grimpoteuthis"));
    // Rest of login view model implementation removed for brevity
    ...
}
Next we have to create our login method that will call the GitHub API to authenticate the user and create a new authorization for our application that we can use to authenticate the user in subsequent calls to the API.
1
2
3
4
5
6
7
8
9
10
11
12
13
14
15
16
17
18
private async Task Login()
{
    _Client.Connection.Credentials = new Credentials(Username, Password);

    var newAuthorization = new NewAuthorization
    {
        Scopes = new List<string> { "user", "repo", "delete_repo", "notifications", "gist" },
        Note = "Grimpoteuthis"
    };

    var authorization = await _Client.Authorization.GetOrCreateApplicationAuthentication(
        "client-id-of-your-registered-github-application",
        "client-secret-of-your-registered-github-application",
        newAuthorization);

    _Client.Connection.Credentials = new Credentials(authorization.Token);
    RxApp.MutableResolver.Register(() => _Client, typeof(IGitHubClient));
}
So, what does this login method actually do?
Line 3 creates the credentials object to pass to the GitHub API by using the username and password that the user has entered.
Lines 5-9 creates the new authorization we will add to the users GitHub account if they have entered their credentials correctly.
Lines 11-14 calls the the GitHub API to create the new authorization for our application, we pass in the ClientId and ClientSecret that were generated when we created the application, and also the authorization object.
Line 16 updates the credentials that the GitHub API client will use in subsequent calls to the API to use the OAuth token generated for us when we created the authorization object.
Line 17 registers the GitHub API client with the IOC container so that we can inject it into all our other viewmodels that need to call the API.
And finally, to wire up the login button to call the new login method, we call the RegisterAsyncTask method on our LoginCommand in the LoginViewModel constructor, like so
1
2
3
4
LoginCommand.RegisterAsyncTask(async _ =>
{
    await Login();
});
That’s the logic for the login taken care of, test it out by pressing F5 and signing in with your GitHub username and password.
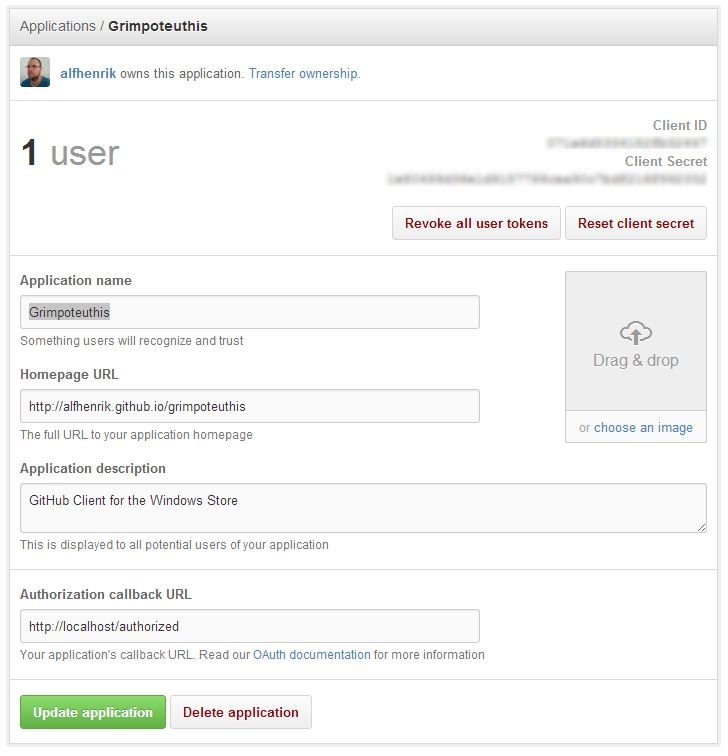
You can check that it has worked (since we haven’t implemented anything past the login page yet), by going back to GitHub, under Account Settings->Applications and selecting Grimpoteuthis. The user count should now display 1.
Error handling
So, now we have our login functionality implemented which is nice and all but what if you enter incorrect credentials, or you have two-factor authentication (more on this later) enabled, or some other error occurs when trying to login?
Currently we have no way to give visual feedback that an error has occurred.
Let’s add some error handling and a way to display the error to the user.
First of all, lets add a textblock control to LoginView where we will display any error messages encountered.
Once we’ve added the textblock for the error message, LoginView will look like below
1
2
3
4
5
6
7
8
<StackPanel Width="350">
    <TextBlock x:Name="ErrorMessage" Style="{StaticResource SubtitleTextBlockStyle}" Foreground="Red" Margin="0,12,0,12"/>
    <TextBlock Text="Username" Style="{StaticResource HeaderTextBlockStyle}" Margin="0,12,0,12"/>
    <TextBox x:Name="Username" Text="{Binding Username}"/>
    <TextBlock Text="Password" Style="{StaticResource HeaderTextBlockStyle}" Margin="0,12,0,12"/>
    <PasswordBox x:Name="Password" Password="{Binding Password}"/>
    <Button x:Name="LoginButton" Command="{Binding LoginCommand}" Content="Login" Margin="0,12,0,0" HorizontalAlignment="Right"/>
</StackPanel>
Then we add a property to LoginViewModel that will hold the error message received from the GitHub API.
1
2
3
4
5
6
string _ErrorMessage = String.Empty;
public string ErrorMessage
{
    get { return _ErrorMessage; }
    set { this.RaiseAndSetIfChanged(ref _ErrorMessage, value); }
}
Now, in the Login method, we wrap the call to the GitHub API in a try catch block so that if the API throws an exception we can catch it and display the error message to the user
1
2
3
4
5
6
7
8
9
10
11
12
13
14
15
16
17
18
19
20
21
22
23
24
25
26
27
28
29
30
private async Task Login()
{
    _Client.Connection.Credentials = new Credentials(Username, Password);

    var newAuthorization = new NewAuthorization
    {
        Scopes = new List<string> { "user", "repo", "delete_repo", "notifications", "gist" },
        Note = "Grimpoteuthis"
    };

    try
    {
	    var authorization = await _Client.Authorization.GetOrCreateApplicationAuthentication(
	        "client-id-of-your-registered-github-application",
	        "client-secret-of-your-registered-github-application",
	        newAuthorization);

	    _Client.Connection.Credentials = new Credentials(authorization.Token);
	    RxApp.MutableResolver.Register(() => _Client, typeof(IGitHubClient));

    	// Just to show that authentication was successful
      Username = String.Empty;
      Password = String.Empty;
      ErrorMessage = "Successfully authenticated with username password";
		}
    catch (Exception ex)
    {
        ErrorMessage = ex.Message;
    }
}
The last thing we need to do, is to wire up the textblock in the view to the ErrorMessage property on the LoginViewModel.
In code behind file of LoginView, add the following this.Bind(ViewModel, x => x.ErrorMessage, x => x.ErrorMessage.Text); to the constructor.
1
2
3
4
5
6
7
8
9
10
public LoginView()
{
    this.InitializeComponent();

    this.Bind(ViewModel, x => x.Username, x => x.Username.Text);
    this.Bind(ViewModel, x => x.Password, x => x.Password.Password);
    this.Bind(ViewModel, x => x.ErrorMessage, x => x.ErrorMessage.Text);

    this.BindCommand(ViewModel, x => x.LoginCommand, x => x.LoginButton);
}
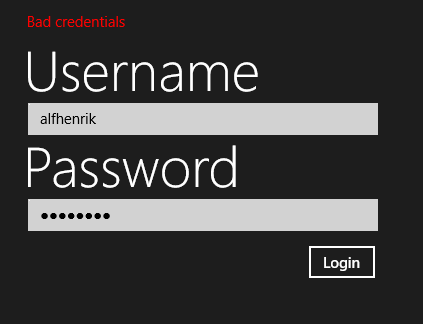
Run the application, and try to login with an incorrect password, you should be greeted with an error message telling you that you have entered bad credentials.
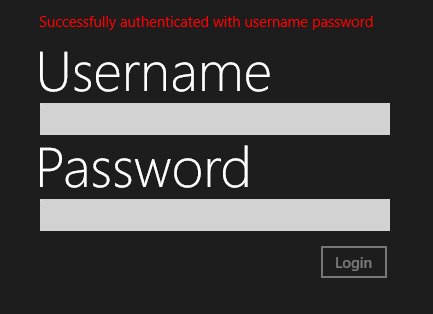
If you enter your credentials correctly you will be greeted by a success message.
If you have two-factor authentication enabled on your account and you try to login you will be greeted by the following error
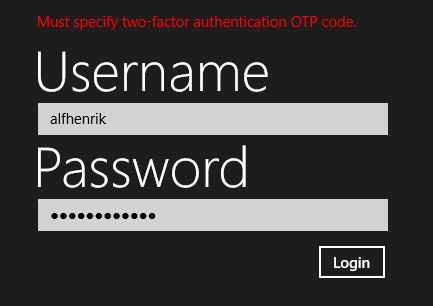
Let’s add support for that now.
Supporting two-factor authentication
To add support for two-factor authentication we have to know that the user has two-factor authentication enabled on their account.
One way we could do it is to check the error message returned by the API and if it is the error message Must specify two-factor authentication OTP code. then we know the user has two-factor authentication enabled and show them an additional textbox for them to enter the code sent to their phone (or through a TOTP application). But, that’s not the most intuitive way to determine if two-factor authentication is enabled or not.
Luckily for us, octokit will return a TwoFactorRequiredException when a user has two-factor authentication enabled.
So all we have to do is an additional catch in our Login method
1
2
3
4
5
6
7
8
9
10
11
12
13
14
15
16
17
18
19
20
21
22
23
24
try
{
  var authorization = await _Client.Authorization.GetOrCreateApplicationAuthentication(
      "client-id-of-your-registered-github-application",
      "client-secret-of-your-registered-github-application",
      newAuthorization);

  _Client.Connection.Credentials = new Credentials(authorization.Token);
  RxApp.MutableResolver.Register(() => _Client, typeof(IGitHubClient));

 	// Just to show that two-factor authentication was successful
  Username = String.Empty;
  Password = String.Empty;
  OneTimePassword = String.Empty;
  ErrorMessage = "Successfully authenticated with One Time Password";
}
catch (TwoFactorRequiredException tfrex)
{
    ErrorMessage = tfrex.Message;
}
catch (Exception ex)
{
    ErrorMessage = ex.Message;
}
We need to add a way for the user to enter the OTP code so add the following to LoginView
1
2
3
4
5
<StackPanel x:Name="OneTimePasswordDetails">
    <TextBlock Text="One Time Password" Style="{StaticResource SubheaderTextBlockStyle}" Margin="0,12,0,12"/>
    <TextBox x:Name="OneTimePassword" Text="{Binding OneTimePassword}"/>
    <Button x:Name="TwoFactorButton" Content="Authenticate" Margin="0,12,0,0" HorizontalAlignment="Right"/>
</StackPanel>
In LoginViewModel we have to add a property to determine if we should show the OTP details, a property for the OTP code, and command for sending the code to the GitHub API and authenticating the user.
1
2
3
4
5
6
7
8
9
10
11
12
13
14
15
bool _RequireOneTimePassword;
public bool RequireOneTimePassword
{
    get { return _RequireOneTimePassword; }
    set { this.RaiseAndSetIfChanged(ref _RequireOneTimePassword, value); }
}

string _OneTimePassword = String.Empty;
public string OneTimePassword
{
    get { return _OneTimePassword; }
    set { this.RaiseAndSetIfChanged(ref _OneTimePassword, value); }
}

public ReactiveCommand TwoFactorCommand { get; protected set; }
And we bind them to the view in the constructor in LoginView.xaml.cs
1
2
3
4
5
6
7
8
9
10
11
12
13
14
public LoginView()
{
    this.InitializeComponent();

    this.Bind(ViewModel, x => x.Username, x => x.Username.Text);
    this.Bind(ViewModel, x => x.Password, x => x.Password.Password);
    this.Bind(ViewModel, x => x.ErrorMessage, x => x.ErrorMessage.Text);

    this.BindCommand(ViewModel, x => x.LoginCommand, x => x.LoginButton);

    this.Bind(ViewModel, x => x.OneTimePassword, x => x.OneTimePassword.Text);
    this.OneWayBind(ViewModel, x => x.RequireOneTimePassword, x => x.OneTimePasswordDetails.Visibility);
    this.BindCommand(ViewModel, x => x.TwoFactorCommand, x => x.TwoFactorButton);
}
The last thing we need to do, is to implement the method executed by the TwoFactorCommand
In the constructor of LoginViewModel add the following
1
2
3
4
5
6
var canAuthenticateWithOTP = this.WhenAny(x => x.OneTimePassword, (otp) => !String.IsNullOrWhiteSpace(otp.Value));
TwoFactorCommand = new ReactiveCommand(canAuthenticateWithOTP);
TwoFactorCommand.RegisterAsyncTask(async _ =>
    {
        await AuthenticateWithOTP();
    });
And the AuthenticateWithOTP method
1
2
3
4
5
6
7
8
9
10
11
12
13
14
15
16
17
18
19
20
21
22
23
24
private async Task AuthenticateWithOTP()
{
    var newAuthorization = new NewAuthorization
    {
        Scopes = new List<string> { "user", "repo", "delete_repo", "notifications", "gist" },
        Note = "Grimpoteuthis"
    };

    try
    {
        var authorization = await _Client.Authorization.GetOrCreateApplicationAuthentication(
            "client-id-of-your-registered-github-application",
            "client-secret-of-your-registered-github-application",
            newAuthorization,
            OneTimePassword);

        _Client.Connection.Credentials = new Credentials(authorization.Token);
        RxApp.MutableResolver.Register(() => _Client, typeof(IGitHubClient));
    }
    catch (Exception ex)
    {
        ErrorMessage = ex.Message;
    }
}
And we tell the application that OTP is required by adding RequireOneTimePassword in the catch (TwoFactorRequiredException tfre) block of the Login method.
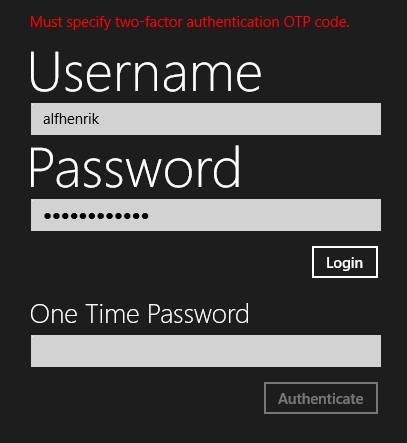
Now when you login to an account with two-factor authentication enabled you will be prompted to enter an OTP code to authenticate that you are who you say you are.
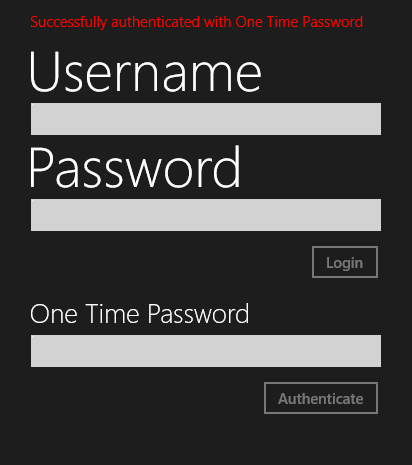
And after entering the OTP code sent to your phone (or through a TOTP application) and clicking Authenticate
That’s it for this post! I hope you found this a useful walkthrough of how to implement authentication, including two-factor authentication, against the GitHub API using the octokit NuGet package.
In the next post, we will implement navigation to a dashboard page once the user has successfully authenticated themselves.
Until then, thank you for reading!
Source for this series of blog posts can be found here
